close

Music

EducationMusic

Practice Room Routines That Actually Translate to Stage Confidence

Practice is only useful if it survives contact with an audience. The goal isn’t perfection in a quiet room—it’s reliability under lights, noise, and nerves. Here’s a practical blueprint to turn solo practice into stage-ready confidence.

1) Start With “Performance-First” Warmups

Before scales or rudiments, do a 90-second micro-performance: play a chorus, run a fill into a downbeat, sing a hook. No stopping, no fixing. This tells your brain, “we’re here to perform,” not just to iterate. Then move into technique. Bonus: track one tiny improvement you’ll showcase at day’s end.

2) Use Laddered Tempos (Down Then Up)

Don’t only ramp up. Try 70% → 60% → 80% → 90% → show tempo. Dropping below comfort exposes slop; climbing back builds control. Mark where articulation breaks, then isolate that two-beat cell for 5–10 perfect reps.

3) Red-Light Training: Record Everything

Hit record for every full take. The “red light” triggers the same pressure you’ll feel live. Keep a three-column log: Timestamp (2:13 missed pickup), Likely Cause (breath too late), Fix (inhale on ‘and’ of 4). Review once, apply, move on. Avoid endless replays.

4) One-Take Rule With Non-Stop Recovery

Practice continuing after mistakes. Run the song once per session with a strict rule: no stopping. When you flub, deploy a pre-planned recovery (repeat the bar, simplify the fill, skip the embellishment). Confidence skyrockets when your body knows it can land the plane after turbulence.

5) Build Variability on Purpose

Nerves punish one-path players. Add controlled randomness: practice standing, seated, with lights low, with a fan (simulates stage air), at morning voice vs. evening voice. Change monitoring (one ear, low wedge volume). Variability inoculates you against venue surprises.

6) Rehearse Transitions Like They’re Songs

Crowd impressions hinge on beginnings and endings. Isolate: count-offs, first bar, first lyric, final bar, and bow/outro. Run only these five moments in a loop for five minutes. Add the “walk-up” (hands to instrument, inhale) to engrain calm, efficient movement.

7) Two-Minute Stagecraft Blocks

Confidence isn’t only notes. Rotate micro-blocks:

  • Mic technique: distance control on whispers vs. belts.
  • Body language: plant feet, soft knees, eyes up on downbeats.
  • Space use: three marks on the floor—center, stage left, stage right—practice moving on section changes.
    Two minutes daily prevents the “statue syndrome” live.

8) Breath, Count, Release

Anxiety compresses breath and time feel. Bake in a pre-chorus ritual: inhale on beat 3, exhale on 4, release jaw/shoulders on 1. For drummers, pair it with a lighter grip on fills; for singers, pre-place vowels. A tiny breathing routine anchors the biggest moments.

9) “Set-Builder” Practice, Not Only Song Practice

Once a week, run mini-sets: three songs in show order, no pauses longer than your planned patter. Practice tuning, patch changes, and count-offs inside the clock. The set is the unit of performance; train the unit.

10) Cue-Map Your Brain

Make a one-page cue sheet per song: form (V1/PC/Ch/Br), danger zones, and two confidence cues (e.g., “look up at Chorus 1 hit,” “open palm to drummer on bridge stop”). Tape it at eye level. After a few runs, ditch the paper—but keep the cues.

11) Build a “Mistake Library”

Catalog top five recurring errors (late entrance, over-sung high note, rushing fills, flat vowel on money note, missed pedal change). For each, design a fast fix. Example: high note strain → step down a half-step harmony in emergencies; rushing → ghost a subdivision with tongue or stick. Owning your fixes reduces panic.

12) Practice With Audience Simulators

Invite two friends to sit silently for a five-minute “show.” Or set a timer, turn on bright lights, and film a single take you must publish privately to a trusted chat. The mild social stakes simulate stage stress better than any metronome.

13) End Every Session With a Win Reel

Finish on a clean performance of the trickiest eight bars. Label the file “Win-[date].” On shaky days, listen to three wins before practicing. Confidence is memory; build your receipts.

14) The 24-Hour Rule for Polishing

Sleep consolidates skills. On day two, open with yesterday’s hardest passage. If it fails, don’t spiral; return to 80% tempo, then reclaim show tempo. Keep the improvement curve visible with small annotations (“Day 1: 80–92% clean; Day 2: 96% clean.”)

15) Pre-Show Mini-Ritual

Before gigs, run a five-minute checklist: hydrate, breath cycle, count-off rehearsal, first-line rehearsal, gear glance (cable, power, tuner), and one gratitude thought. Rituals trade uncertainty for routine—and routine feels like confidence on stage.

A Sample 45-Minute Translational Practice

  • 00:00–02:00 Micro-performance + goal set
  • 02:00–10:00 Laddered tempo on hardest passage
  • 10:00–15:00 Transitions loop (count-offs, first bars, endings)
  • 15:00–20:00 Stagecraft block (mic, body, space)
  • 20:00–30:00 One-take run, mistake recovery active, recording on
  • 30:00–40:00 Mini-set (two songs back-to-back, no dead air)
  • 40:00–45:00 Win reel capture + next-session note

Practice like this and stage confidence becomes the byproduct—not the goal. You’ll trust your breath, your body, and your recovery plans, which frees you to connect with the room. If you want structured reps with peers and coaches who hold you to performance-level standards, look into Summer music classes that emphasize live runs, feedback loops, and small-group showcases.

read more
EducationMusic

Signs Your Piano Needs Tuning (Before It Becomes a Bigger Repair)

A well-maintained piano doesn’t just sound better—it ages better. Catching early warning signs can save you from costly fixes down the road. Here are nine cues your instrument is asking for a tuning—and possibly some preventative care.

1) Notes sound “wavy” or beat against each other

If single notes produce a shimmer or “beating” effect, the paired strings (unisons) are no longer aligned. That gentle wobble means the strings are drifting apart in pitch. Left alone, the drift accelerates as seasonal changes pull tension unevenly.

2) Chords lack clarity and feel muddy

Major and minor chords should lock in with a satisfying resonance. When thirds and fifths feel sour, jangly, or indistinct—especially in the middle register—your piano’s overall pitch map has wandered, and the tempering between intervals is off.

3) The piano hasn’t been tuned in 6–12 months

Even with minimal use, string tension relaxes and the soundboard responds to humidity and temperature. Most pianos benefit from tuning at least once (often twice) per year. Waiting longer increases the likelihood that a standard tuning turns into a time-consuming pitch raise.

4) Octaves don’t match from low to high

Play the same note an octave apart up the keyboard. Do this for several pairs. If one key’s octave sounds right but the next pair ripples or clashes, stability is breaking down across sections. Consistent octaves are the backbone of an even, musical instrument.

5) The piano is at A440… except not really

Use a reliable tuning app or reference pitch and compare A4. If your whole instrument sits flat or sharp relative to concert pitch, the piano may require a pitch correction before fine tuning. The further away it drifts, the more stress a return to standard pitch can place on the structure—another reason to catch it early.

6) Weather swings changed how it feels to play

Did your action suddenly feel lighter or heavier? Did the tone brighten or dull after a heat wave or rainy week? Seasonal humidity causes the soundboard to expand or contract, altering tension across hundreds of strings. These shifts often nudge the piano out of tune. A quick check after major weather changes can prevent compounding issues.

7) You’ve moved the piano (even across the room)

Moves introduce jostling and micro-shifts in downbearing and string seating. After relocation—and especially after a house move—let the piano acclimate to its new environment (usually two weeks), then schedule a tuning. Skipping this step can leave the instrument chronically unstable.

8) Certain notes “ring on” or die too quickly

Uneven sustain, buzzing, or notes that decay abruptly can indicate strings not seating correctly on the bridge or issues with the soundboard’s crown and bearing. While some of these are voicing or regulation concerns, they also signal that tension relationships have changed and a precise tuning is warranted before further diagnosis.

9) Performances, recordings, or lessons are coming up

If you’ve got a recital, studio session, or exam, tuning beforehand is essential. Mics hear everything, and students internalize pitch from the instruments they practice on. Keeping pitch true protects ears, technique, and confidence.

Pianos are designed to live under enormous, carefully balanced tension. When pitch drifts, the correction isn’t just cosmetic; it’s structural. The farther the drift, the more aggressive the pitch raise needed to restore stability. That extra work can expose weak points, stretch strings unevenly, and require multiple passes to settle. In contrast, frequent light maintenance keeps tension equilibrium intact and extends the life of strings, pins, hammers, and the soundboard.

Simple habits to keep your piano in tune longer

  • Control humidity. Aim for a stable 42–50% relative humidity. Consider a room humidifier/dehumidifier or a dedicated piano humidity system.
  • Place wisely. Avoid exterior walls, vents, fireplaces, and direct sun.
  • Close the lid when not in use. This reduces dust and temperature shocks.
  • Log tunings. Keep a small card in the bench with dates and notes about seasonal changes or moves.
  • Pair tuning with regulation/voicing checks. Small adjustments to action and hammer felt can make tunings hold better and the tone more even.

If any of the nine signs sound familiar—wavy unisons, sagging octaves, seasonal pitch drift—it’s time to book piano tuning services and bring your instrument back to a reliable, musical baseline.

Quick self-check routine (takes 2 minutes)

  1. Play A4 against a tuning app or tuning fork.
  2. Test three octave pairs (low/mid, mid/high) for ripple or clash.
  3. Play a C major chord in three positions; listen for clarity.
  4. Note any unusual sustain or buzz on suspect keys.
  5. Check your last-tuned date—if it’s been 6+ months, schedule now.

Keeping up with these small signals preserves what makes your instrument special: consistent touch, rich resonance, and the confidence that every session—practice, performance, or recording—starts in tune.

read more
Music

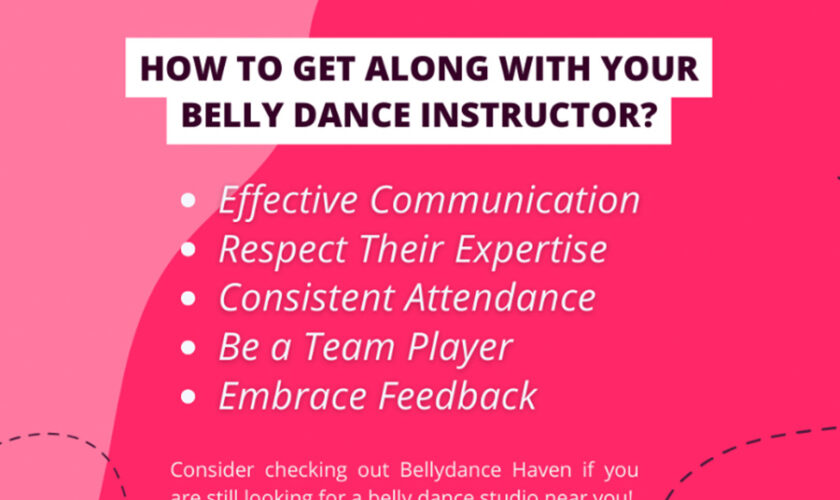
How To Get Along With Your Belly Dance Instructor?

How To Get Along With Your Belly Dance Instructor

Belly dance is an enchanting and intricate art form that combines fluid movements with rhythmic beats, offering not just physical fitness but also a deep cultural experience. One of the keys to mastering belly dance lessons is building a positive and productive relationship with your instructor. Whether you are a beginner stepping into your first class or an advanced student honing your skills, getting along with your belly dance instructor can significantly enhance your learning journey.

First and foremost, mutual respect is paramount. Recognise that your instructor brings a wealth of knowledge, experience, and passion to the studio. Acknowledge their expertise and be open to their guidance and feedback. Communication is equally important; don’t hesitate to express your goals, ask questions, or seek clarification on movements and techniques.

Being punctual and prepared for each class shows your commitment and respect for your instructor’s time and effort. Additionally, practise patience and positivity, understanding that progress in belly dance, as in any art form, takes time and persistence.

Finally, fostering a collaborative environment by supporting your fellow dancers and maintaining a positive attitude can create a harmonious and encouraging atmosphere. By following these steps, you can build a strong, supportive relationship with your belly dance instructor, paving the way for a fulfilling and enriching dance experience.

Are you passionate about belly dancing and seeking a nearby belly dance studio with an instructor? Establishing a positive rapport with your instructor is crucial for a rewarding learning journey.  Here are a few things you should know when getting along with your belly dance instructor.

1. Effective Communication:

  • Share your goals and expectations openly.
  • Ask questions and seek clarification.
  • Provide feedback to personalise your lessons.

2. Respect Their Expertise:

  • Trust their knowledge and experience.
  • Avoid making comparisons.
  • Acknowledge their commitment to your growth.

3. Consistent Attendance:

  • Attend classes regularly and be punctual.
  • Demonstrate dedication and commitment.
  • Adhere to studio rules and policies.

4. Be a Team Player:

  • Support fellow dancers.
  • Offer assistance when needed.
  • Foster a positive, inclusive atmosphere.

5. Embrace Feedback:

  • Accept criticism graciously.
  • View feedback as a path to improvement.
  • Celebrate your progress, no matter how small.

Showing up on time and ready for class shows your dedication and respect for your instructor’s time and effort. Patience and a positive attitude will help you overcome challenges and celebrate the progress you make as you master belly dance.

Supporting your fellow dancers fosters a collaborative environment and creates a positive, encouraging atmosphere. This not only makes learning more enjoyable but also strengthens the bond within the dance community.

The key to getting along with your belly dance instructor is respect, communication, commitment, and positivity. By incorporating these elements into your approach, you create a productive and enjoyable learning environment where both you and your instructor can thrive. This harmonious relationship will enhance your belly dance journey and boost your growth and confidence.

Want to learn more about belly dancing? Consider checking out Bellydance Haven if you are still looking for a belly dance studio near you!

read more
EducationMusic

7 Essential Skills Every Aspiring Audio Engineer Needs

Audio engineering is a dynamic and multifaceted field that requires a blend of technical proficiency, creative insight, and problem-solving abilities. If you’re passionate about sound and considering a career in audio engineering, developing a robust set of skills is crucial for success. Here are seven essential skills every aspiring audio engineer needs to master.

1. Technical Proficiency with Audio Equipment

Understanding and mastering audio equipment is fundamental for any audio engineer. This includes knowing how to operate mixing consoles, microphones, audio interfaces, and various other recording and production tools. Familiarity with signal flow, gain staging, and the proper use of outboard gear is essential. Hands-on experience with both analog and digital equipment will prepare you for a wide range of professional scenarios.

2. Proficiency in Digital Audio Workstations (DAWs)

Digital Audio Workstations (DAWs) are the cornerstone of modern audio production. Proficiency in popular DAWs like Pro Tools, Logic Pro, Ableton Live, and Cubase is crucial. These platforms are used for recording, editing, mixing, and mastering music and audio projects. Mastering DAWs involves not only understanding their features and functions but also developing efficient workflows to streamline the production process.

3. Strong Understanding of Audio Theory and Acoustics

A deep understanding of audio theory and acoustics is essential for creating high-quality recordings and mixes. This includes knowledge of sound waves, frequency response, phase relationships, and room acoustics. Understanding how sound behaves in different environments helps you make informed decisions about microphone placement, speaker setup, and acoustic treatment, leading to better sound quality in recordings and live sound settings.

4. Critical Listening and Attention to Detail

Critical listening skills are vital for audio engineers. This involves the ability to discern subtle differences in sound, such as frequency balance, dynamics, and spatial placement. Developing a keen ear allows you to make precise adjustments during mixing and mastering, ensuring that the final product is polished and professional. Attention to detail is also crucial, as small imperfections can significantly impact the overall quality of a project.

5. Problem-Solving and Troubleshooting Abilities

Audio engineering often involves troubleshooting and solving technical issues that arise during recording, mixing, or live sound production. Being able to quickly diagnose and fix problems, such as signal loss, noise interference, or equipment malfunctions, is a valuable skill. Strong problem-solving abilities help ensure that sessions run smoothly and that any issues are resolved efficiently, minimizing downtime and maintaining high-quality results.

6. Effective Communication and Collaboration

Audio engineers frequently work with artists, producers, and other industry professionals. Effective communication skills are essential for understanding the creative vision and technical requirements of a project. Being able to convey technical information in an accessible way and collaborate with others to achieve the desired outcome is key. Good interpersonal skills also help build positive working relationships, which are crucial for a successful career in the industry.

7. Continuous Learning and Adaptability

The field of audio engineering is constantly evolving, with new technologies, techniques, and trends emerging regularly. A commitment to continuous learning and adaptability is essential for staying current and competitive. Whether studying audio engineering from a music program or on your own, this involves keeping up with industry developments, attending workshops and seminars, and experimenting with new tools and methods. Being open to learning and adapting to changes ensures that your skills remain relevant and that you can continue to deliver high-quality work throughout your career.

Conclusion

Aspiring audio engineers must develop a diverse set of skills to thrive in this dynamic field. Technical proficiency, proficiency in DAWs, a strong understanding of audio theory, critical listening, problem-solving, effective communication, and a commitment to continuous learning are all essential. By honing these skills, you’ll be well-equipped to tackle the challenges of audio engineering and succeed in a variety of professional environments. If you’re passionate about sound and ready to embark on a rewarding career, focusing on these key areas will set you on the path to success.

read more